
Windows, Windows 11
Download & Install Windows 11 Pro/Home ISO for Free (32 & 64 Bit)
Step-by-Step Guide: Download & Install Windows 11 ISO with USB
Before we begin, we need to check if the device is compatible with the Windows 11 edition.
Step 1: Check Your System Requirements with PC Health Check
Please ensure your device meets the basic requirements before downloading Windows 11:
- Processor: 1 gigahertz (GHz) or faster with 2 or more cores on a compatible 64-bit processor or System on a Chip (SoC).
- RAM: 4GB.
- Storage: 64 GB or larger storage device.
- System firmware: UEFI, Secure Boot capable. Check your PC’s compatibility here. (there is a small video for you to understand how to check)
- Graphics card: Compatible with DirectX 12 or later with WDDM 2.0 driver.
- Display: High definition (720p) display greater than 9” diagonally, 8 bits per color channel.
Step 2: Visit the Microsoft site for Media Creation Tool for creating Windows 11 Bootable USB
1. Download the media creation tool by following the link
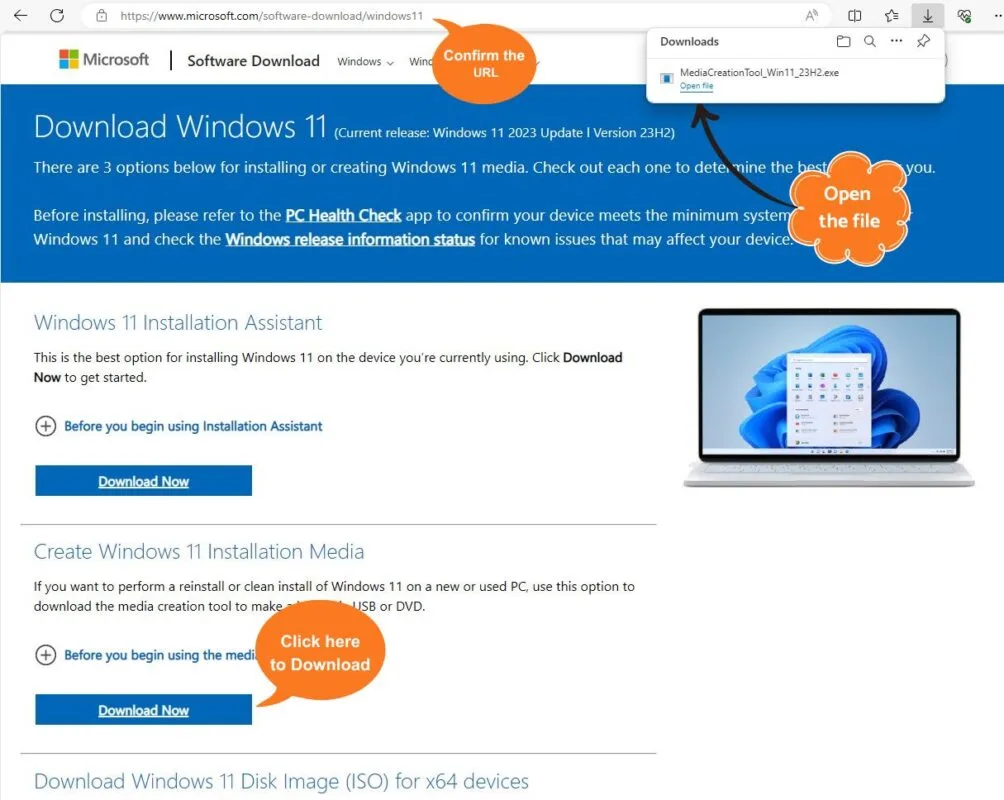
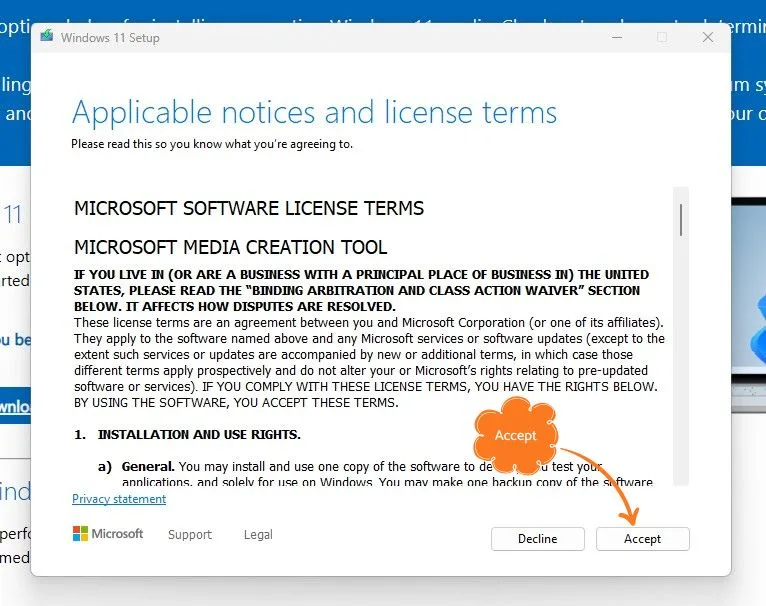
Step 3: Insert USB Flash Drive and Run the Downloaded Windows 11 Media Creation Tool
Insert the USB flash device into your PC and keep it connected until the process is complete. Run the Media Creation tool file and click “Accept.”
Step 4: Choose Language and Windows 11 Edition Pro, Home according to you needs.
Select your preferred language and Windows 11 Edition from the dropdown menu.
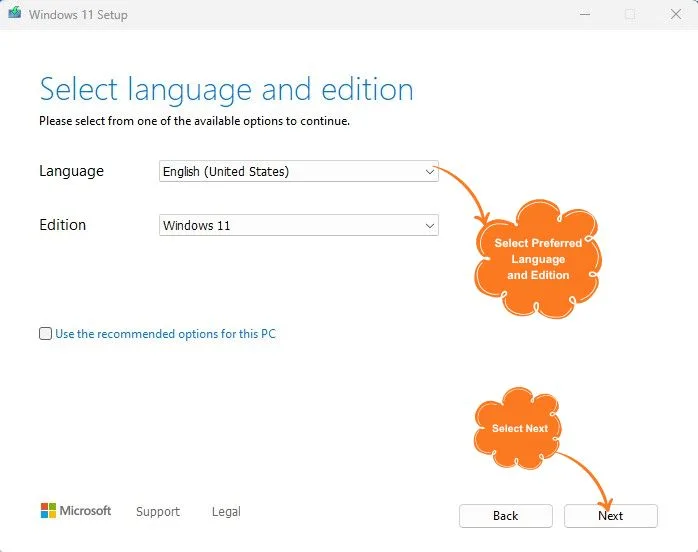
Note: You may also choose to download the Windows 11 OS ISO file, but this requires additional software to create a bootable USB.
Step 5: On the Next step of Creating Windows 11 OS Bootable Select the inserted USB flash Drive.
Choose the USB device connected to your PC and click “Next” to create a Windows 11 USB bootable device. This process duration may vary based on your network speed.
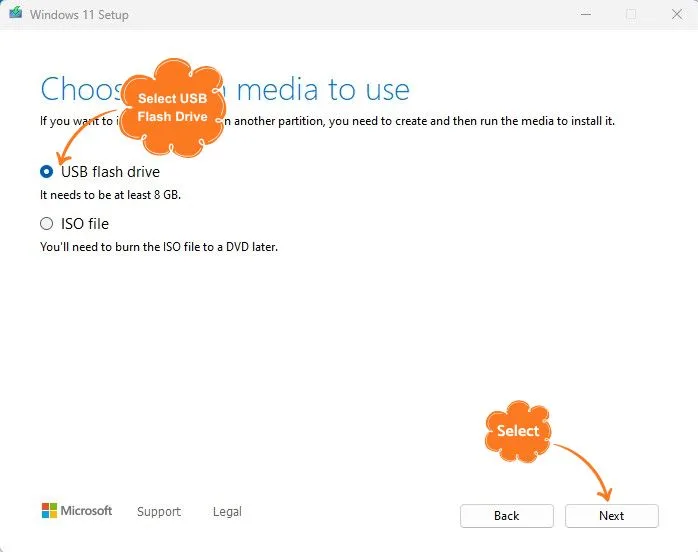
This will take some time basing your internet speed to create Windows 11 download to a bootable USB drive.
Congratulations! You have successfully created a bootable device for installing Windows 11.
The above steps are performed to create a USB media device for installing Windows 11. Proceed to the last Section to boot Windows 11 download.
Boot Windows 11 on to the PC
Step 1: Insert the Windows 11 Bootable USB Storage and Restart the PC
Insert the Windows 11 bootable USB storage into your PC and restart it. During the boot-up process, press F12 or F2 (this button might be different with your PC, please check PC brand website) to access the boot menu.
Step 2: Select the Inserted USB Device
From the boot menu, select the inserted USB device to initiate the Windows 11 installation process.
Step 3: Select Language, Currency, Keyboard and Click on Next
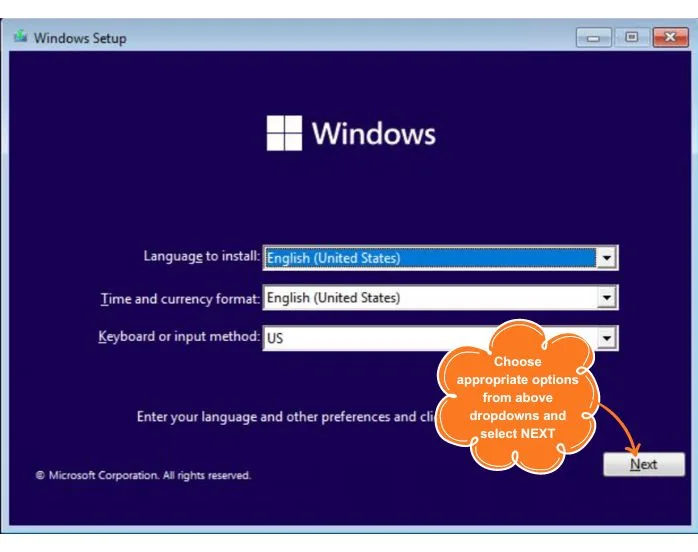
In the meantime, you can purchase genuine Windows 11 activation keys here.
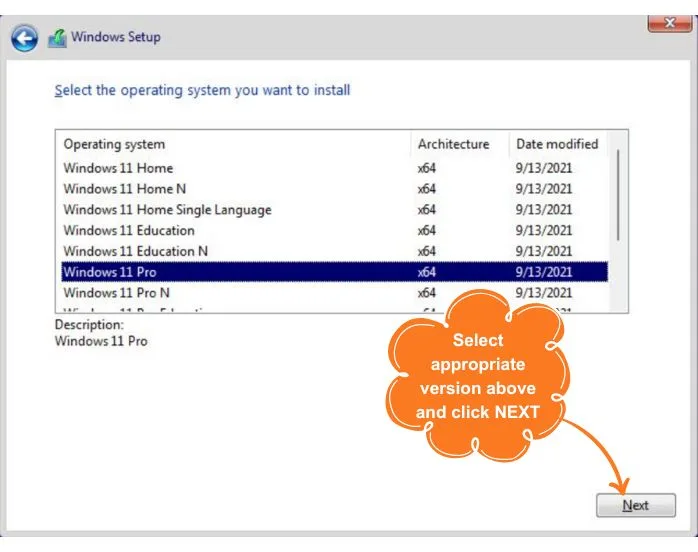
Select the preferred edition of Windows 11 (e.g., Windows 11 Pro, Windows 11 Home) and click “Next.”
Here you will get an opportunity to select the Windows 11 32 or 64 Bit, Choose accordingly.
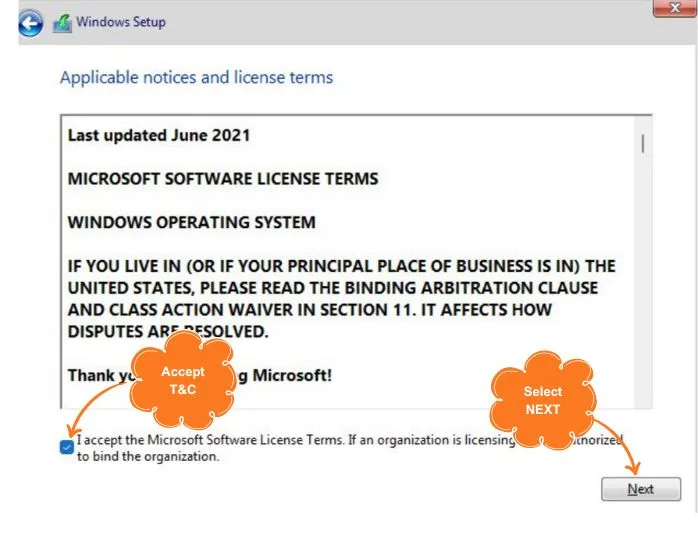
Read and accept all the terms and conditions, then click “Accept” and “Next.”
Step 4: Custom Installation
Select “Custom: Install Windows Only (Advanced)” as the installation type. Choose the partition where you want to install Windows 11 OS and click “Next.” The Windows 11 installation process will begin.
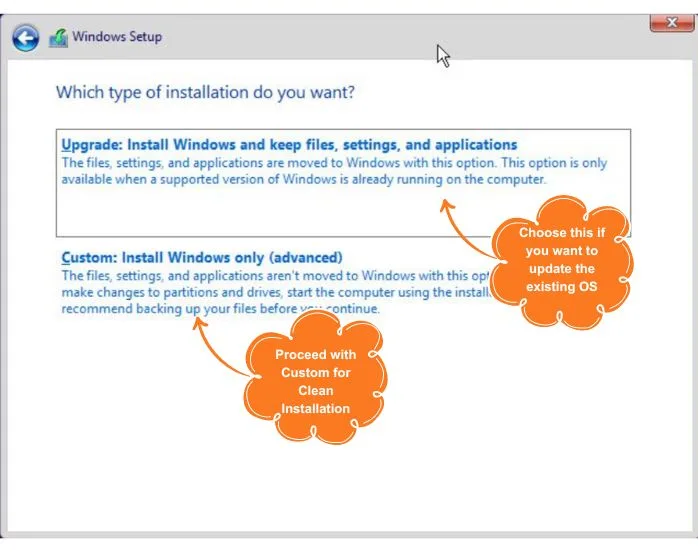
Note: If your PC doesn’t detect a hard drive during Windows 11 installation, you may need to load a driver. Refer to your PC manufacturer’s website for the appropriate driver.
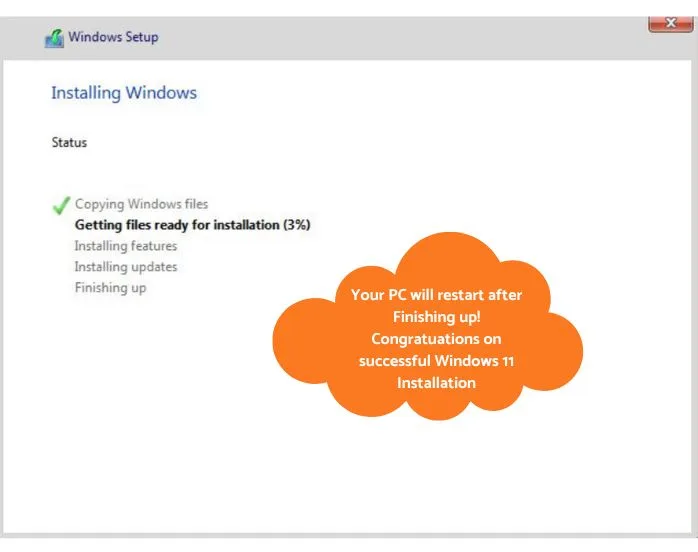
Once Windows is installed, your PC will restart. Follow the prompts to complete the device setup.
Activate your Windows 11
Steps to Activate your Windows 11 Pro or Home with a Product Key purchased from Flash Fix India
Step 1: Navigate to Settings
Go to the Settings of your computer or laptop.
Step 2: Select System
From the list, select the “System” option.
Step 3: Choose Activation
Select the “Activation” option on the screen.
Step 4: Activate or Change Product Key
Choose the “Activate” or “Change Product Key” option as required.
Step 5: Enter Product Key received from Flash Fix India. You can find the License Keys here
Enter the Windows 11 product key received in your email address.
Step 6: Activate Now
Click “Activate Now.” The activation process may take 20-30 seconds.
Your Windows 11 is now fully activated on your computer.
Follow this link for Download and Activate Windows 10 Pro, Home ISO for Free (32 & 64 Bit Full Version)
Windows 11 Product Keys
Windows
Windows 11 Home Product Key | Single Language | Original License Key – 1 PC, Lifetime License